Tweet

Sunday, December 12, 2010

Epson Perfection scanner V330

Just bought this from Amazon for just under £79 including delivery. You can see it at Epson V330 Scanner at Amazon.

My expensive Canon 9900F will be put onto eBay after Christmas. Although this could scan 4 x 6 355mm negs in one go, albeit a long go, it does not work in Windows 7 and Canon are not updating drivers.


I will review how it performs, I mainly want to scan negs and slides and I have been looking on eBay for a cheap solution so that I can check scanners out in March at The Focus On Imaging Exhibition but eBay options almost as expensive.


- Posted using BlogPress from my iPad


- Posted using BlogPress from my iPad

Friday, December 03, 2010

how to process negative images using tone curves in lightroom

Recently I have been taking photos with film cameras using mono film and processing at home. Maybe it is just nostalgia or perhaps a desire to make the photo the experience rather than being seduced by the modern miracles of digital SLR.

Anyway after developing I copied all the negatives with my Nikon D90, Sigma 105mm Macro and light box. I use Lightroom 3 to process all my photos, together with Picasa to act as an easy front end for retrieval and searches. I was surprised to discover that neither has a standard command to simply convert negatives to positives. But this can be easily achieved in Lightroom and even applied in batch mode by making a simple preset.

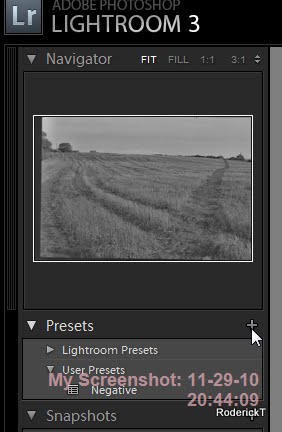
Here you can see some positive and negative imges in Lightroom.

From WebImages

Select a negative and choose Develop mode, and then select the Tone Curve, which you simply reverse so that instead of a straight line from bottom left to top right it is a straight line from top left to bottom right. THis causes black to become white, white black and all shades to be progressively reversed with mid grey remaining mid grey.

From WebImages

From WebImages

To do this just click on each end point and drag either to top or bottom.
From WebImages

From WebImages

The positive result is shown below.

From WebImages

I then saved these setting in a Lightroom Preset.

From WebImages

I used the following settings when saving the preset. Note I had turned on 'Auto Tune' which had a dramatic effect on the output of what otherwise were quite flat negatives. I called the Preset 'Negative'

From WebImages

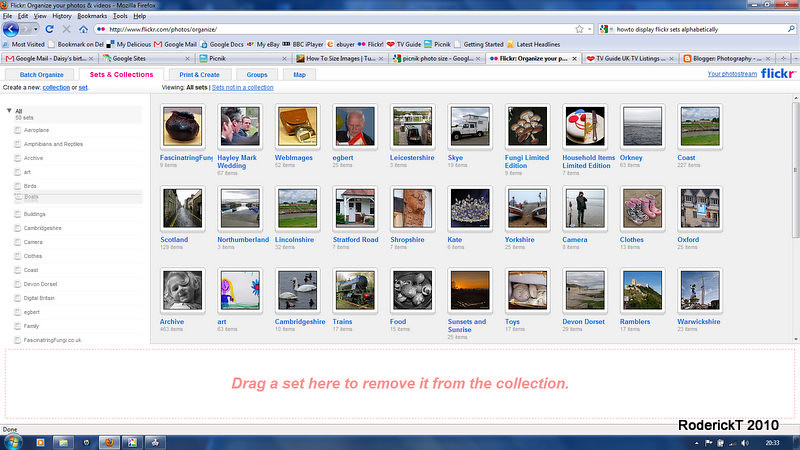
Now in the Grid you can select all of the negatives, and then apply this Negative preset to all of them in a single batch. The Negative preset was at the bottom of a long list of supplied presets.

From WebImages

And here is the result.

From WebImages


Note

Because the Tone Curve created above inverts the luminosity then other commands effecting luminosity will also be reversed. For example increasing the blackness will in fact increase highlights, increasiung brightness will darken.

Monday, November 29, 2010

Picasa database broken - How to fix

Tried to look for photo for Christmas Card, but Picasa had corrupted it's database, so I had to un-install and re-install.

Did this twice as first time I had taken the option not to delete database, hoping it may fix without losing any of my previous settings. It did not. On restart Picasa found all my photos and rebuilt database OK but I did lose Albums which is just a logical collection of photos.

The keywords were all OK. This is because the keywords are written to the meta data of each photo. Picasa edit commands are kept in each folder in the Picasa.ini file so these are OK but I always export final photos to consolidate edits into normal jpg.

Note. If like me you use Photoshop Elements and/or Lightroom to do your key wording make sure you write these to photos. There are options in both products to do this, but it is easy to forget I would like to know if you can make this a default anywhere. If you use Picasa to add keywords these are automatically added to photo metadata.

Tuesday, October 12, 2010

Test to see if I can embed one of my flickr photos in Blogger with iPad

I know I can embed Picasa photos, so this is an attempt to embed flickr photo. The following should be a photo of a Parasol Mushroom.

IMG_0819 Parasol Mushroom - Macrolepiota procera - North Norfolk Coast 20-09-2010

Hey presto I can!

Problem setting Location.in Lightroom 3 Using Picasa

Having prepared 50 photos of long Norfolk walk in Lightroom 3 I added location using Picasa after which Lightroom 3 reported them as corrupted! I could do no further editing in Develop mode but as I had completed this phase this was not a problem.

However Lightroom refusal to export them to their final destination was a problem causing me to lose all of my Development work.

My work methodology is to post process in Lightroom Develop, add keywords, rename with meaningful names and then switch to Picasa to add location, back to Lightroom to export to final file folder and upload better ones to Flickr. Although the photos appeared in index grid they were reported as corrupted. Looking at photos in Picasa the names and keywords all still OK but of course Picasa could not add Lightroom Development changes.

I had to open every photo in Photoshop CS5, do a small change so that I could save it, then Lightroom accepted it and would export the photos applying Lightroom edits. The small change was necessary otherwise CS5 ignored save. Important not to rotate any photo whilst in CS5 as Lightroom does not detect this and your beautiful sky graded filters are applied from the side!

I guess I will have to add location in Picasa before I start any Lightroom processing.
Does any know better way to add location in Lightroom.  

Friday, July 30, 2010

Kookaburra Narrawallee Ulladulla NSW Australia 19-03-2006


Took this photo at my pal's house at Narrawallee. Great place, great bird.

I am adding it to this blog purely as an experiment and to gain experience of making a blog entry direct from Picasa Web Album.

Next I want to see if I can get Blog update to appear on Facebook automatically.

Picasa - How to use Graduated Tint to darken one side of photo.

Howto use Graduated Tint to darken one side of photo.

  1. Rotate photo so side you want to darken is on top.
  2. Use Graduated Tint adjusting three controls

    - Amount using default black colour.
    - Feather to blend in shading.
    - Position by moving small cross to where you want the darkening to reach

    to achieve desired effect.
  3. Save before rotating to original position otherwise darkening will revert to top.
    Note by saving a copy of original photo is made before all edits are written to image.
See example annotated Youtube slideshow below.


Saturday, June 12, 2010

Flickr - Sort Sets Alphabetical

I currently have 50 Flickr Sets, and wanted to sort them alphabetically. However there appears to be no function to do this. You can sort photos within a set but not the sets themselves on the Flickr page.

Sets within a Collection can be manually sorted, so I created a collection called ALL and have manually sorted these sets alphabetically. Took about 5 minutes but should be a one off exercise. Next time I create a set all I need do is add it to ALL collection abd move it to the relevant position.


To create this Collection and organize alphabetically go to the Flickr Organize screen and select "Collections and Sets" Tab, create new Collection and drag and drop the Sets into it making sure you drop them alphabetically. I did this by taking each Set in sequence as shown by default on the display, and as I dragged it into the column on the left under the ALL Collection I made sure I dropped it in the correct place alphabetically. If you miss you can position your mouse over it in the left column and drag it to correct place.

Monday, June 07, 2010

Adding or editing Flickr blogger link solved.

Flickr now has the ability to post directly to several Blogger applications. This is quite simple to set up, it is the last option under the share button.

However I struggled to find out how to change ny template or add further blogs once I had created my first.

If you want to do this then you need to go to following link.

http://www.flickr.com/blogs.gne

Wednesday, May 19, 2010

Picasa - How to reduce brightness

There is no general brilliance control provided in Picasa. You can increase highlights and/or add fill-in light to increase brilliance, You can also make the dark areas darker by adjusting the shadow slider, but this does not effect the bright and mid tones.

However you can achieve overall darkening by using the graduated filter. This is generally used to decrease the brightness of the sky and enhance blue colour or cloud definition. In this effect you set where the graduation is to end which is indicated by a cross which is set at the centre of the photo, the amount of shade and feathering.

If you drag down the cross to the bottom of the photo and set the feather to 0, then the whole image is darkened uniformly and the amount can be controlled by the shade slider.

You can also change the colour of the shade, but being colour blind I keep away from this feature.

Saturday, April 24, 2010

Photoshop Elements 6 - Camera RAW Profile

The RAW processing in my PSE did not have any camera profile.

I discovered that as well as replacing Camera Raw.8bi you need to execute the program CameraProfiles.exe Both these are downloaded from Adobe, and I used the ZIP for PSE v6 file found at http://www.adobe.com/support/downloads/thankyou.jsp?ftpID=4582&fileID=4238

Note Camera_RAW_5_5.zip is the latest version supported on PSE 6. Itried v5.6 and 5.7 and confirmed these did not work

Saturday, March 27, 2010

Nikon D90 First Thoughts

At the recent Focus of Imaging I upgraded my Nikon D80 to a D90. I chose the FoI as deals were available and I purchased D90 with Sigma 18-55 f2.8-4 AF OS lens. I sold lens on eBay immediately and offset some of the cost.

The first thing I noticed was how good images were at higher ISO settings, even up to 1600 ASA. Other things I noticed quickly were

Faster continuous shutter operation.
Easier menus.
Brilliant screen.